First, I want to show off a layout my BFF, Judy, made with one of my Page Heroes:

She did a great job! Judy is a brand-spankin' new digital scrapbooker. She's been learning Photoshop Elements and having some success and some frustration.
I sent her some of my Page Heroes (quick pages) to try, thinking they might be easiest to start with, and she loved them. When she sent me her completed layout she said:
"Those are so darn fast and handy! I can't wait to try the other ones. Really nice the way the pictures just slip up underneath. I didn't add any extra embellishments or do anything else - just stuck the pictures in."
Then Judy proceeded to ask if it's possible to change the "color & stuff" of the Page Hero. This made me smile. Well, yes, you COULD change the colors, at least, using some more advanced techniques . . . but pre-made pages like my Page Heroes aren't really meant to be used that way. They are meant to provide a super-fast and easy way to whip up a layout in mere minutes.
I smiled because Judy's question indicates that her skill level & her understanding of layers has
already moved beyond Page Heroes which have a single layer with cut-outs for photos. She's already chomping at the bit to change the page elements!
Judy, your next step is TEMPLATES! To make the transition to templates easy for you, I've taken the same Page Hero - Hearts - and turned it into a template. Here it is
FREE (for a limited time):
or
(More templates can be found
here)
(More Page Heroes can be found
here)
Don't forget - ALL Digital Scrapbooking products by Webajeb areCOPYRIGHT-FREE!!!The downloadable zipped file contains the same template in two different formats; .PSD for Photoshop and Photoshop Elements users, and in .TIF format for users of digital scrapbooking programs that don't work with .PSD files. (Thanks to Grace for the suggestion to include .TIF files!)
Templates have multiple layers with each element on a separate layer. Recolor the elements, clip digital paper to them, re-size, duplicate, or remove them, whatever your little heart desires, Judy! Templates can be thought of almost as a pattern, or guide; something to jump-start your own creativity. The resulting layout can be completely true to the template or have no noticeable resemblance at all. Most are somewhere in-between. Every scrapbooker makes the template his or her own.
Templates give beginning digital scrapbookers the opportunity to learn all kinds of new skills while providing a starting point, or base, for a completed layout. Tutorials abound on the internet, as do online digital scrapbooking classes, both free and paid. Just a few of my favorite places to get help when I was learning are:
Blogs have become a fabulous source for tutorials in the past couple of years:
Jessica Sprague has a ton of great info and tutorials.
Kayla Lamoreaux's blog,
Digital Scrapbooking 101, is chock-full of great info for both beginners and advanced digi-scrappers.
There are tons more, just do a Google or Yahoo search specifying the particular software package you use (including the version), include the word
tutorial as well as the specific task you want to learn such as
recolor elements,
create text, etc.
Judy has suggested that I include with my downloadable Page Heroes some basic instructions on how to use them, and I think it's a great idea! I'll be writing something up soon, and also for my templates, and then including the documents in each downloadable bundle. If they are not needed, the instructions can be ignored, but if they are needed, it could make the difference between a fun experience and a frustrating one.
Feedback like Judy's, and Grace's, is helping me become a better digital designer.
So grab my free template, make it your own, and then send me your feedback, suggestions, and layouts. I'd love to hear from you!

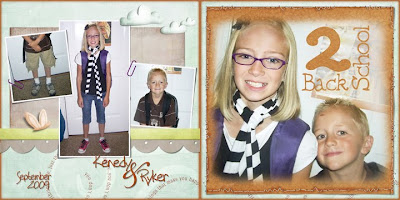
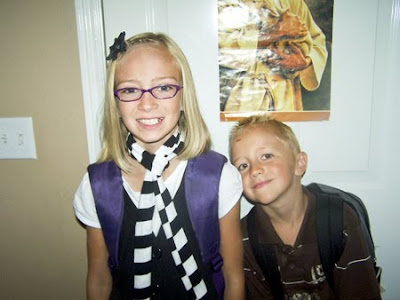 My cousin kindly offered me the use of several photos she took of her kids on their first day back to school this year. I immediately noticed, in the above photo, the "dead" space above the little boy's head, not to mention the distracting glare. So I custom-designed a photo mask to deal with that space
 It's basically a soft focus with the title cut out in the upper right corner, right where the distracting elements are in the photo. Here is the photo clipped to the mask and then placed on a very simple layout:
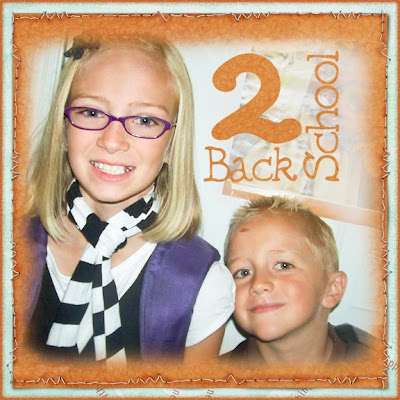 Note: I also used the dodge tool in Photoshop CS3 to lighten the area behind the words, to make the glare even less noticeable and to make the words stand out.
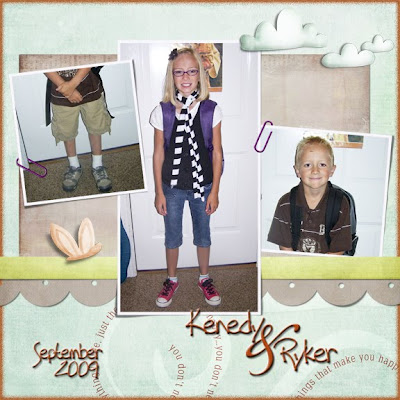 . . . and the two page layout:
 So, cuz, what do you think??


