Wednesday, October 28, 2009

Template Freebie and Converting Rectangular Format to Square


{papers by Catherine Designs; ribbon by Summer Driggs}

Wow, I actually made a layout for my OWN scrapbook, LOL!  I have been so busy with client work that I have not done that in ages.  I used one of my own templates for the page; one that I have not posted yet, or given away as a freebie.  So I am doing that now.  Here it is, in its original 8.5 x 11 format:


{Webajeb-Template-037}

I converted it to 8 x 8, since that is the size I use for my own layouts.  It is not hard.  I simply opened the template and a new 8 x 8 document.  I highlighted all the layers in the template except for the white background, then dragged them into my new document.  Did you know that if you hold down the Shift key while dragging the layer(s) will land smack in the middle of the document?  Try it; it's SO cool!

I then resized the text boxes just a bit, and moved the title to look more balanced.  That's it, really!  You could drag the whole shebang into a 12x12 document, too, and then while the layers are still highlighted, resize to fit.

Going from square format to rectangular is just as easy.  Experiment a little, and see just how versatile templates can be!

I decided to go ahead and include both the rectangular & square formats in the download file.  Be aware that the square one is not my usual 12x12, but 8x8. I also did not include the font names for 2 out of the 3 fonts  because I had created this template before I began doing that, and now I don't remember what the fonts were.

Download the template in PSD format from 4shared here.

Download the templates in TIF format from 4share here.


Tuesday, October 27, 2009

Double-Double Freebie Day - 2-Page Template AND WordArt!

Yay, it's double-double day!  A FREE double-template (2-page layout) AND a FREE bit of Word Art!  First, the template:

Webajeb-Template-040

This was inspired by a sketch in the may/june 2007 issue of Scrapbooks, Etc., a magazine I still receive even though I'm nearly 100% digital.  I say "nearly" because I still do some hybrid projects, and I still get tons of layout ideas from the paper scrapbooking world which I then convert to digital.

Here are the two individual pages of the template.  {All three are included in the free download links at the end of this post.}
 
{left page}


 {right page}

Here is the layout I made today, using the template:


{background papers by Cottage Arts and Kim's Scrapping}

A closer look at the individual pages:


{left page}


{right page}

I custom-designed the word art for this page because I felt I wanted another circle somewhere, and also needed a title, so this is what I came up with.  I hope you like it because it's today's FREE word art, and it's INCLUDED in the template download!  For you font-collectors, the font I used is Downcome which you can download at dafont {one of my fave font sites}. Here's a closer look at it:


Download the templates (plus word art) in TIF format from 4shared here.  

Download the templates (plus word art) in PSD format from 4shared here.

Of course, as is the norm, these templates include all my Easier-to-Use features! 
Feedback is appreciated so I can continue to improve my digital scrapbooking products, as well as come up with the new stuff you are longing for!

Enjoy! 

Friday, October 23, 2009

FREE Digital Scrapbooking Template by Webajeb


Webajeb-Template-038

Here is one of my latest templates, free to my blog readers; you'll find the download link at the end of this post.  For those of you who are keeping track, yes, the most recent templates have been posted totally out of order.  I have at least a half-dozen that I have not yet posted, but am hoping to get them up very soon.  So keep an eye on this blog!  Subscribe to it, or Opt In to receive e-mail notifications when it's updated; that way you won't miss any!

And, of course, some of them (all?) will be offered FREE here first, then eventually uploaded to my online store.  Right now I'm pretty slow about getting stuff into my online store - I don't know, lately I just haven't felt like doing the techie stuff but I'll get caught up one of these days.  Oh, and don't forget, as of this post, the links to freebies on my blog never expire!  {As I wrote in that earlier post, I haven't had time to go back and re-link all the freebies from all my earlier posts, so if you find a freebie you want and the link has expired, simply email me, tell me which item you'd like, and I'll send you the link.}

Ok, back to today's free template.  It's a double-header!  LOL, I mean a 2-page spread.  I do LOTS of 2-page spreads - I love to have a unified look across both pages, especially in albums of specific events, like weddings.  I use a 24 inch wide by 12 inch high document to create the 2-page spreads.  I did the same for this template.  The template document size is 24x12 and, as you can see, the title runs across the center divider.  The template file includes a layer with a thin divider line - you'll want to hide or delete this layer before you print or publish the layout, the same way you hide or delete the layer with the photo numbers on it.

For those of you who prefer to work with single pages, I'm also including the template as two separate 12x12 documents (with the title moved to one page).  Here they are:


left page


right page

Oh, and something new!  In addition to the Easier-to-Use features I've already added to my templates, I am now also including the name of the font that I've used in any text layers.  I know how frustrated I get when I'm using a template someone else has designed, and they've used a totally cool font for their title and/or journaling and I want to use the same font, but don't know its name.  So from now on in my template files that info will be included in the name of any layers that use fonts.

Here is today's template as I used it for a double-page spread in an album I'm currently working on:


{flame element by Amy Hutchinson}

Isn't that fun?  You can see that I haven't hidden the divider line yet.  I like to wait until the very last minute to do that so I don't inadvertently allow it to run through someone's face, or through some other important element.

Here's a closer look at the pages after separation:


left page


right page


If you've never scrapbooked in the double-page format you're probably wondering how you're gonna print that thing.  Obviously, you've got to split it into two documents first but doing that is a LOT easier than you might think.  Here's how:

First, hide or delete any layers you don't want to print including the divider line and the numbers layer.  Next, flatten the document.  Answer 'yes' if you are asked whether you want to discard any hidden layers.  DO NOT SAVE.

Select your crop tool and set its Width and Height parameters each to 12 inches, type 300 in the Resolution box and select pixels/inch. Hold down the CNTL key (CMD for Macs) and press the hyphen (-) key so that there's some room around the borders of your document.  Position your mouse a little up and to the left of the top-left corner of the document.  Drag it toward and past the center bottom of the document, then release the mouse button.  Double-click inside the selection to accept it.  You will now see ONLY the left page.

Select File, Save AS, and save your layout under a new name (I usually just add an A to the existing filename), and in .JPG format for printing.  Your new file will go into the folder you indicated, and the original .PSD file will remain open.

IMPORTANT STEP!  In the History palette, go back to the step before Crop (keyboard shortcut: CNTL-Z will take you back one step).  Now repeat the cropping process, this time starting with the mouse position a little up and to the right of the top-right corner and dragging, again, toward and past the center bottom.  Select File, Save AS, and save under another name (I usually just add a B to the existing filename), and in .JPG format (with Quality = 10) for printing.

Now you can Close (don't save!) your original double-page file.  When asked if you want to save changes, choose No (else you'll end up saving your .PSD or .TIF file in the flattened format).

Download the double-page template from 4shared here for .PSD and here for .TIF.

{UPDATE: the individual page templates are included in each downloadable .ZIP file; sorry for the confusion!}

Let me know if you have ANY problems; I'm here to help!

Tuesday, October 20, 2009

Free Digital Scrapbooking Templates with Easier-to-Use Features!

Webajeb-Template-026

Here's one of my latest templates.  I say "one of" because I've got a dozen or more new ones created, I just haven't had time to get them uploaded.  I will be doing that over the next week or two, so be sure to check back here frequently or, better yet, subscribe to my blog so you don't miss a single one!

Here is today's template used in a layout:


Since the photos I wanted to use were all landscape-oriented I turned the template on its side, added a textured background, an overlay on the arrow element, and finally, got a little creative with the title.  Next I created a simple, one-photo layout to use as a facing page for a nicely balanced 2-page spread:


So - What are the new "Easier-to-Use" features of my templates?

First, I'll now be offering all my templates in both .PSD and/or .TIF format. The two formats will be packaged separately in downloadable .ZIP files; you will be able to download EITHER format or, if you like, BOTH formats.  I will no longer be zipping the two formats together, as I have done on occasion in the past, because it makes a downloadable file that's just too big for many user's systems to handle. (NOTE: I'm looking into also offering the templates in .PNG format if I find there is enough interest, so if you are interested, be sure to let me know!)

The second feature has been an integral part of my templates for awhile now but many people either don't know about it, or don't realize its significance.  Simply put, the name of each layer in my template files that is meant to be used for "clipping" begins with a plus (+) sign.  For example, in today's template there are 10 layers meant to be used for your photos, so the layer names would be as follows:

+ Photo 1
+ Photo 2
+ Photo 3

and so on, with the presence of the Plus Sign to indicate that this layer is suitable for clipping a photo (or paper).  I can't claim this idea as my own; Jessica Sprague began doing this with her own templates and she wrote {in a blog posting, if I remember right} that she hoped other designers would do likewise.  I loved the idea so am more than happy to include it as a feature in my own templates. I think you're going to love it, too!

Third, all of my templates will now include a topmost layer with numbers to identify each subsequent layer.  As far as I know no other designer is doing this.  This layer can be turned on or off as you desire, while you are working with the template, and then it should be either hidden or deleted before printing or publishing your layout. The first image of today's template posted at the beginning of this post shows the template with the numbers layer turned off, or hidden.  Here is the template with that layer turned on:


No more trying to figure out which layer is which in the template file!  The numbers correspond to the layer names in the .PSD or .TIF file and make it easy to select the exact layer where you intend to place your photo.  Just click on the numbered layer you want THEN drag in your photo.  The photo will automatically land just above the layer you selected.  Clip the photo to the layer, resize it, and it's done!

Ready to try out the new Easier-to-Use features?  Download Webajeb-Template-26 in .PSD format here or in .TIF format here.

Enjoy!

Tuesday, October 13, 2009

Fun and FREE Digital Alpha PLUS Word Art


What's more fun that a bit of FREE digital Word Art??  How about the entire alphabet plus numbers AND punctuation (in .PNG format and 300 dpi)??!


Several designers have created "outlined" alphas, and then overlap the letters as I did above, for a really fun look.  I tried to find a set to purchase that allows S4H use (scrapbooker for hire) at no extra charge, but was unsuccessful, so I ended up creating my own.  It was fun, and now I can use them in any way I want on either my own personal layouts, or for client layouts.

AND - I'm giving them to you - FREE!  I've zipped them up into one file which you can download from 4shared by clicking here.  Resize, recolor, and use in any way you like.  All of my products are copyright-free so no worries - just have fun!

All of the letters of the alphabet are in one .PNG file, so you'll need to marquee each letter and copy & paste (or drag) to your document.  Overlap the letters as desired to get the look of the "Drama Queen" word art.

One of these days I'll make individual .PNG files for each letter, and offer the set in my online store, but that will have to wait until I have fewer client projects.  Meanwhile, enjoy the alpha, and I'd love to know what you think of it, and see what you use it for.


Friday, October 9, 2009

Free Digital Photo Mask and Back-to-School Layouts

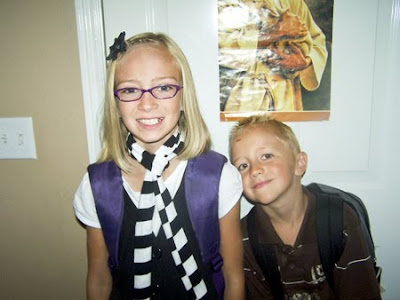
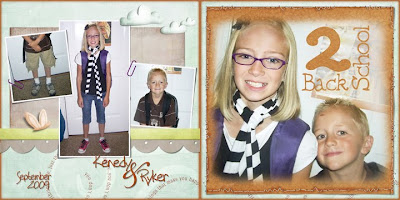
My cousin kindly offered me the use of several photos she took of her kids on their first day back to school this year. I immediately noticed, in the above photo, the "dead" space above the little boy's head, not to mention the distracting glare. So I custom-designed a photo mask to deal with that space
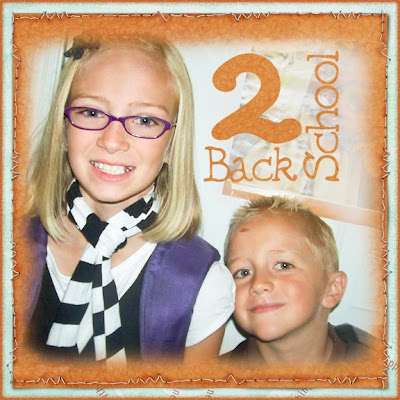
It's basically a soft focus with the title cut out in the upper right corner, right where the distracting elements are in the photo. Here is the photo clipped to the mask and then placed on a very simple layout:

Note: I also used the dodge tool in Photoshop CS3 to lighten the area behind the words, to make the glare even less noticeable and to make the words stand out.

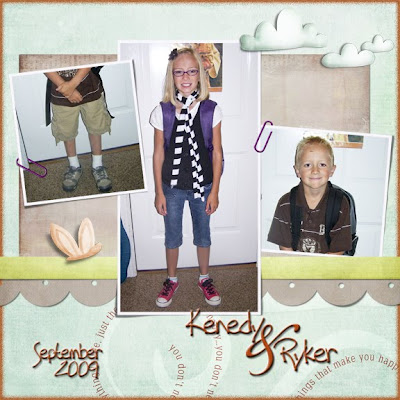
The accompanying page:

. . . and the two page layout:

So, cuz, what do you think??

I must apologize to my customers that I was only able to make 3 Back-to-School photo masks. I had intended to make 8 or so, but client orders have been coming in so I've been very busy with photo-book and digital scrapbook projects. Designing my own products has to take a backseat to my custom-designed layout work, since that is really the main focus of my little biz.

I do have some templates already made, just need to finalize them, zip them and upload to 4shared. I'll be working on getting those up over the next couple weeks.

Meanwhile, click here for a FREE download (at 4shared) of the Back-to-School photo mask featured in this post. Enjoy!

Wednesday, October 7, 2009

Birthday Card Digital Photo Collage

I made this card for my son's 32nd birthday {wow!} and wanted to share it here since some of my family and friends who knew I was working on it, wanted to see it. Now that the birthday is past I can post these pics. By the way, the card was very well received. Rodrigo's dad, and wife, Dianna, probably enjoyed it just as much as Rodrigo; Dianna because she loves to see photos of her hubby when he was little, and his dad because he remembers those days well.

I create custom-designed greeting cards, to order, for any occasion!}

I also made the envelope {how cool is that?} using two pages torn out of a travel magazine and these directions by wikiHow. It was super-easy, eco-friendly, and added a really fun touch to the card. Not to mention, since I had neglected to make my card a standard size, I didn't have an envelope to fit! However, I liked the end result so much that I will probably be making envelopes for all the cards I send from now on.

I located some of my favorite photos of Rodrigo during his first year of life and scanned them into digital format. I restored the faded color {these were originally stored in the now infamous magnetic photo albums!}, cleaned up some dirt and scratches, sharpened them a bit, and then popped them into a collage template {a modified version of Scrapbook Etc.'s SBEQuickCollage303 which you can find here}.

I added the arrow in the top left photo pointing to my pregnant belly, and a bit of text to each of the other photos.

To make the card I simply printed out the photo collage and then adhered it to a folded piece of cardstock using black photo corners, for a bit of an old-fashioned look. You can either type up a sentiment, print it out, and glue it inside, or just hand-write it. Easy!
Seeing the photo on the top right really brings back memories. I hadn't the first clue what to do with a baby! It's pretty obvious by the look on my face. Rodrigo's dad didn't know any more than I did, we were just kids ourselves, but we managed; we just figured it out day by day.

I especially love the bottom left picture where Rodrigo is covered with the yellow-and-white gingham tied quilt I made for him, and which he carried around for years {his blankie}. What you can't tell from the photo is that Rodrigo is in an infant seat on the floor of the front passenger seat of our 1960 VW bug {as seen in the top left photo} - that's where he rode whenever we went anywhere. Every time we went around a corner too fast he would tip over!!! Yeah, no car seat laws in those days, I guess it's a miracle he even survived, but I'm SO GLAD he did!

Happy Birthday, Rodrigo! Love you!!